Building an Interpreter: Lexical Analysis - Part 1
 Photo by Kaleidico
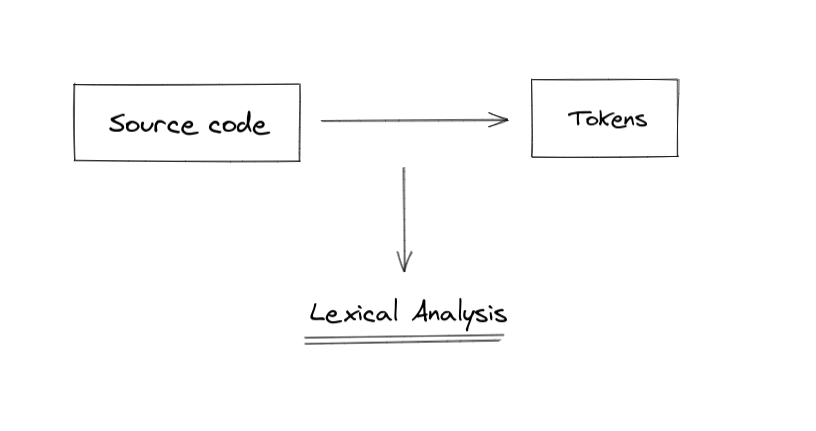
Lexical Analysis is the process of transforming the source code into tokens. Tokens are an accessible form to ease the way we interpret the programming language.
The book Writing an Interpreter in Go shows a very simple example to illustrate how lexing works. Imagine this source code:
let x = 5 + 5;
We read this source code and generate tokens like this:
[
  LET,
  IDENTIFIER('x'),
  EQUAL_SIGN,
  INTEGER(5),
  PLUS_SIGN,
  INTEGER(5),
  SEMICOLON,
];
letwill be theLETtokenxwill be theINDENTIFIERtoken with literal"x"=will be theEQUAL_SIGNtoken5will be theINTEGERtoken with literal5+will be thePLUS_SIGNtoken5will be theINTEGERtoken with literal5again;will be theSEMICOLONtoken
Take a look that we don't count "spaces" as tokens.
Defining tokens
To define tokens, I created a class to represent and to create tokens when we start to analyze our source code.
export type TokenType = string;

export class Token {
  type: TokenType;
  literal: string;

  constructor(type: TokenType, literal: string) {
    this.type = type;
    this.literal = literal;
  }
}
The implementation is very simple. It contains the token type and the literal value. A simple example would be a token like the basic + operator. We create it like this:
const plusToken = new Token('PLUS', '+');
It has the type PLUS and the literal value +.
Now let's define all the possible token types for the Monkey language.
export enum Tokens {
  ILLEGAL = 'ILLEGAL',
  EOF = 'EOF',
  IDENT = 'IDENT',
  INT = 'INT',
  ASSIGN = '=',
  PLUS = '+',
  COMMA = ',',
  SEMICOLON = ';',
  LPAREN = '(',
  RPAREN = ')',
  LBRACE = '{',
  RBRACE = '}',
  FUNCTION = 'FUNCTION',
  LET = 'LET',
}
Now we can use the defined tokens instead of a random string. Let's see the + example again:
const plusToken = new Token(Tokens.PLUS, '+');
Nice!
Lexer
As we saw earlier, the lexer receives the source code and output tokens that have a more accessible source code representation.
Our lexer will receive the source code input and it'll have a method called nextToken to output each token while reading the source code.
To validate our Lexer code, let's add tests to match tokens.
import { Tokens, Token } from 'src/token/token';
import { Lexer } from '../lexer';

describe('Lexer', () => {
  it('matches each token', () => {
    const input = '=+(){},;';
    const tokens: Token[] = [
      { type: Tokens.ASSIGN, literal: '=' },
      { type: Tokens.PLUS, literal: '+' },
      { type: Tokens.LPAREN, literal: '(' },
      { type: Tokens.RPAREN, literal: ')' },
      { type: Tokens.LBRACE, literal: '{' },
      { type: Tokens.RBRACE, literal: '}' },
      { type: Tokens.COMMA, literal: ',' },
      { type: Tokens.SEMICOLON, literal: ';' },
      { type: Tokens.EOF, literal: '' },
    ];

    const lexer = new Lexer(input);

    tokens.forEach(({ type, literal }) => {
      const inputToken = lexer.nextToken();
      expect(inputToken.type).toEqual(type);
      expect(inputToken.literal).toEqual(literal);
    });
  });
});
Ok, let's break it down!
- The
inputis our source code. It'll be transformed into tokens. - The
tokensis a list of tokens we expect to match the source code. - The
Lexeris a class to be implemented.- It receives an input as source code.
- And have a
nextTokenmethod to output the next token.
- For each token in the list of tokens, we want to test if they match the "next token" from our lexer.
Running our test, we get an error as we didn't implement our Lexer yet. So let's do it!
To help analyze the source code, we will have 4 different variable helpers:
input: this is the actual source code.position: the current position of the current char we are reading.readPosition: the position we are about to read the next char.char: the character of the source code we are reading.
With these four parameters, we can build a simple class representing the Lexer.
export class Lexer {
  input: string;
  position: number;
  readPosition: number;
  char: string;

  constructor(input: string) {
    this.input = input;
  }
}
Running our test again, we fix the lexer instantiation. But now we got another issue. When reading each token, we expect that the Lexer instance has a nextToken method. But in our current lexer implementation, we don't do much. We just let it be instantiated. Let's implement the nextToken method.
To get started, we first need to make sure that the lexer starts with its variables in the correct state. We do this in the constructor.
INITIAL_POSITION = 0;
EMPTY_CHAR = '';

constructor(input: string) {
	this.input = input;
  this.setUpInitialState();
}

private setUpInitialState() {
  this.position = this.INITIAL_POSITION;
  this.readPosition = this.INITIAL_POSITION;
  this.char = this.EMPTY_CHAR;
}
The initial state for the positions is the index 0 and the char starts with the empty character ('') state.
The nextToken algorithm is very simple in this first implementation. We just need to:
- read the next character
- transform this character into a token
- return this new token
"read the next character" is basically the idea of updating the current state of the position, the readPosition, and the char variables.
private readChar() {
  if (this.readPosition >= this.input.length) {
    this.char = '';
  } else {
    this.char = this.input[this.readPosition];
  }

  this.position = this.readPosition;
  this.readPosition += 1;
}
We start verifying the readPosition to make sure that we didn't finish reading the entire source code. If we finish reading the source code, we just update the char with its initial state (empty string).
To get the next character, we just access the input with the next position index and update the char.
After that, we always need to update the indices:
positionbecomes thereadPositionreadPositionincrements by one
Now that we read the next character, we can generate the token based on this new current state. Here it's very simple. We just need to map the current char to its own Token. We build this with a simple switch case.
private getToken(): Token {
  switch (this.char) {
    case '=':
      return new Token(Tokens.ASSIGN, '=');
    case ';':
      return new Token(Tokens.SEMICOLON, ';');
    case '(':
      return new Token(Tokens.LPAREN, '(');
    case ')':
      return new Token(Tokens.RPAREN, ')');
    case ',':
      return new Token(Tokens.COMMA, ',');
    case '+':
      return new Token(Tokens.PLUS, '+');
    case '{':
      return new Token(Tokens.LBRACE, '{');
    case '}':
      return new Token(Tokens.RBRACE, '}');
    case '':
      return new Token(Tokens.EOF, '');
  }
}
So let's get everything together now. We need to set up the lexer with the appropriate state and then start reading the source code. The constructor looks like this now:
constructor(input: string) {
  this.input = input;
  this.setUpInitialState();
  this.readChar();
}
and the nextToken looks like this:
nextToken(): Token {
  const token = this.getToken();
  this.readChar();
  return token;
}
As we read the next character in the constructor of the Lexer, we can start by getting the token, read the next character and return the created token.
Running our test again, we fixed all the issues and it is passing now.
Final words & Resources
I'm very happy to share with you the first post about my journey learning compilers and studying programming language theory.
This is the first part of the Lexical Analysis posts and part of the Building an Interpreter series.
These are the resources I'm using to learn more about this field:
- Crafting an Interpreter: the open source project of the compiler for the TypeScript version of the Monkey programming language.
- Programming Language Theory: a bunch of resources about my studies on Programming Language Theory & Applied PLT.
- Writing an Interpreter in Go: the book I'm reading to learn and implement the Monkey compiler.