Performance: Prefetch Next Pages Chunks
 Photo by Aditya Chinchure
Web performance is one of the things I got really interested these days and I'm get myself always learning, reading, and trying things out.
The idea of this post is to share some ideas about prefetching and how it can be a nice technique to speed up page load (of the next page the user will navigate to).
One common way to use prefetching (resource hint) is the declarative link tag together with the rel="prefetch" attribute. It looks like this:
<link rel="prefetch" href="/next-page-bundle.js" />
In this article, we will see this tag generated by Webpack prefetch import as I'm doing in a React project.
We will create a fake web app from zero using create-react-app, set up different pages (routes), add an analyzer for webpack bundles, separate each page into loadables, and finally prefetch the next page.
Set up routes
First thing first, let's create the project using create-react-app. If you have the npx installed, you just need to do:
$ npx create-react-app prefetch-chunk
This will scaffold the project for you. It uses Webpack under the hood to build the application.
Now that we have an initialized project, let's add the react-router to the package.json.
$ yarn add react-router-dom
We can use the Router and Route from react-router to build simple routes. Here will have a Home, Step1, Step2, and Step3 pages.
import React from 'react';
import { BrowserRouter as Router, Switch, Route, Link } from 'react-router-dom';

const Home = () => <h2>Home</h2>;
const Step1 = () => <h2>Step1</h2>;
const Step2 = () => <h2>Step2</h2>;
const Step3 = () => <h2>Step3</h2>;

const App = () => (
  <Router>
    <div>
      <nav>
        <ul>
          <li>
            <Link to="/">Home</Link>
          </li>
          <li>
            <Link to="/step-1">Step 1</Link>
          </li>
          <li>
            <Link to="/step-2">Step 2</Link>
          </li>
          <li>
            <Link to="/step-3">Step 3</Link>
          </li>
        </ul>
      </nav>

      <Switch>
        <Route path="/step-1">
          <Step1 />
        </Route>
        <Route path="/step-2">
          <Step2 />
        </Route>
        <Route path="/step-3">
          <Step3 />
        </Route>
        <Route path="/">
          <Home />
        </Route>
      </Switch>
    </div>
  </Router>
);

export default App;
Now we have this 4 pages:
/: Home/step-1: Step1/step-2: Step2/step-3: Step3
Great! Super simple! Routes set up.
Add webpack-bundle-analyzer
In this section, we want to use the webpack-bundle-analyzer library to be able to analyze the Webpack bundles. Let's add it:
$ yarn add webpack-bundle-analyzer
To analyze the bundles, we need to generate the stats from the bundles first and then use the library to analyze them. Something like this:
$ webpack-bundle-analyzer ./build/bundle-stats.json
So I made a script to build first and then analyze:
// package.json
"analyze:bundle": "yarn build --stats && webpack-bundle-analyzer ./build/bundle-stats.json"
Now we can run it and see the stats:
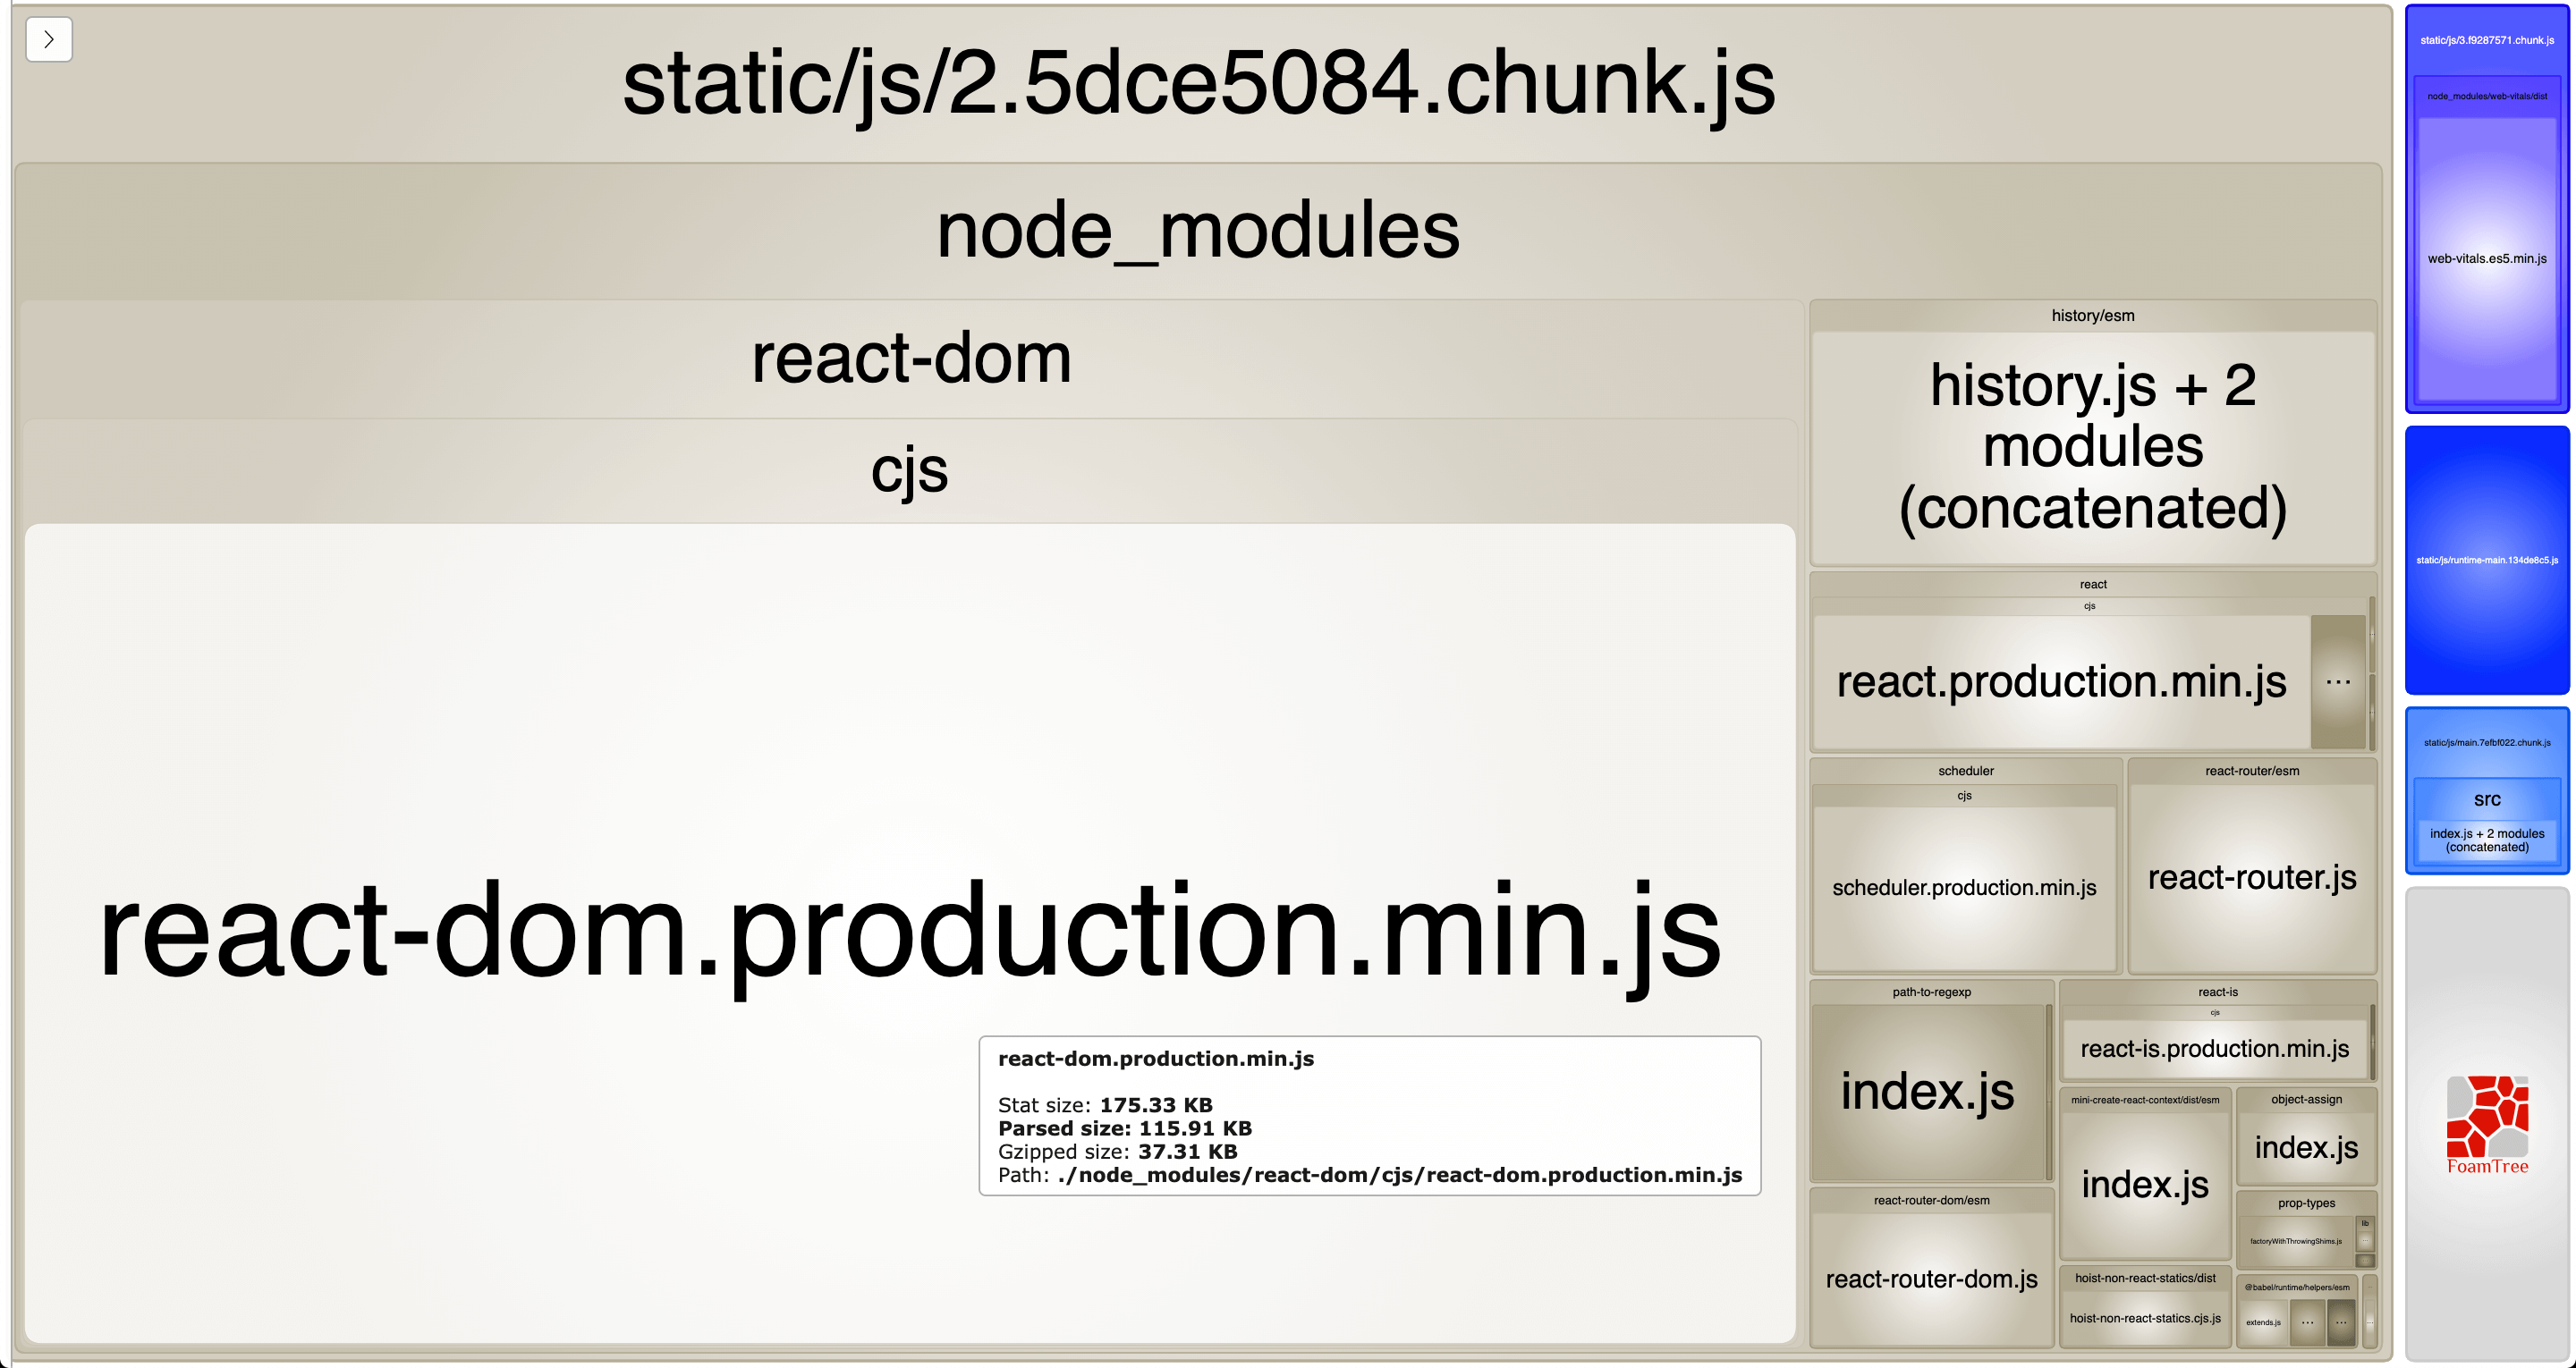
The biggest chunk is about some libraries in the node_modules. But if we look closely, we can see the main chunk:
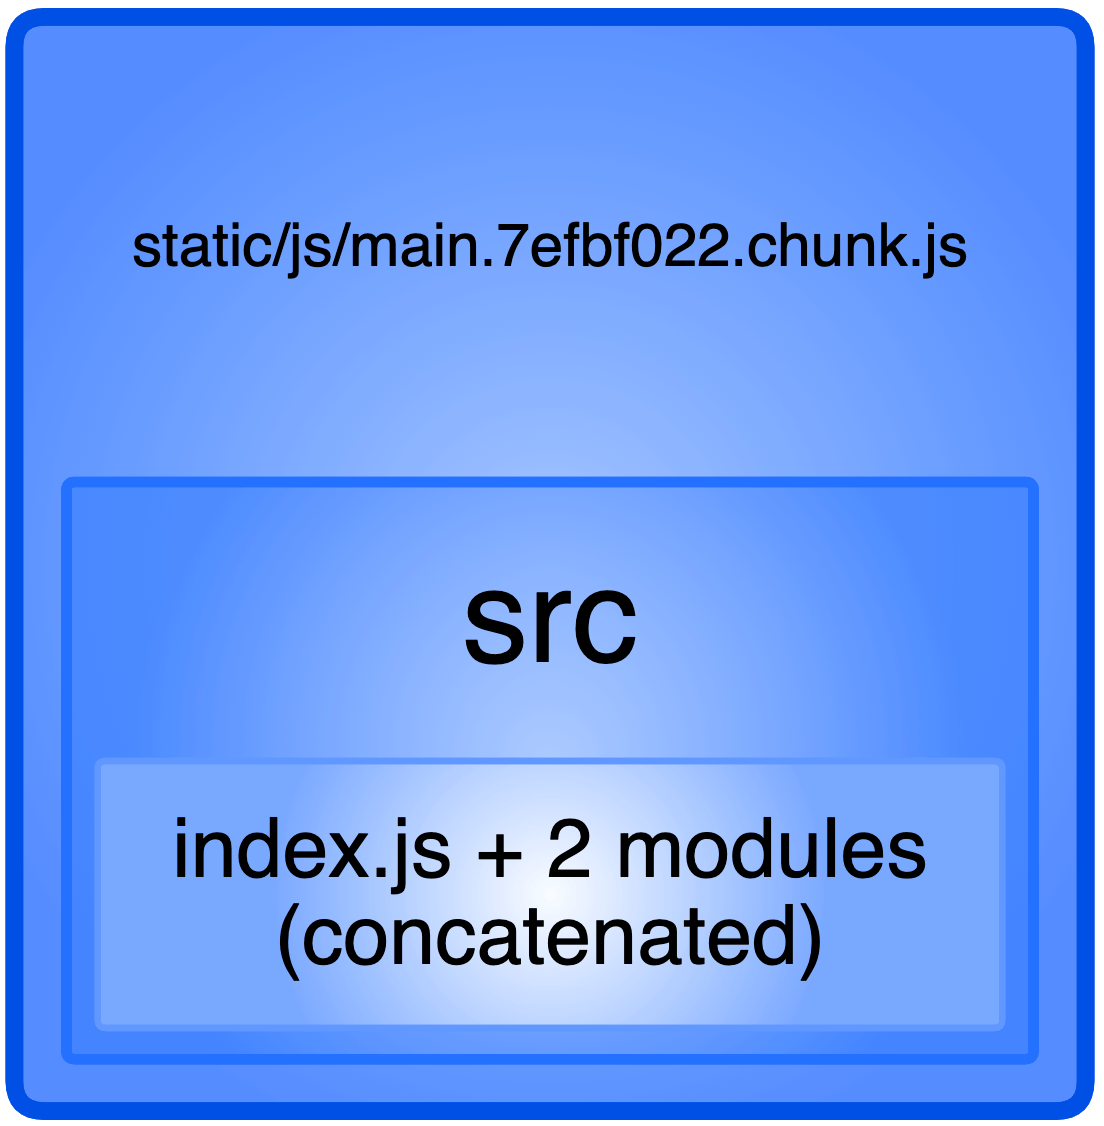
This is the main component we created for the routes.
Separate pages in loadables
Now that we have webpack-bundle-analyzer, we can split the pages into its own chunk and analyze them with this library.
To code split each route, we can use some libraries. For this article, we'll use @loadable/component:
$ yarn add @loadable/component
Let's break down the pages into its own folder and files using the loadable. The structure will look like this:
src
│___ App.js
│
└─── Pages
│     └───Home
│       │___ Home.js
│       │___ index.js
│
│     └───Step1
│       │___ Step1.js
│       │___ index.js
│
│     └───Step2
│       │___ Step2.js
│       │___ index.js
│
│     └───Step3
│       │___ Step3.js
│       │___ index.js
I didn't want to make the project structure super complex, so the Pages folder it is. Now let's see each folder how we can use the loadable to code split our application.
- Home Page
// src/Pages/Home/Home.js
const Home = () => <h2>Home</h2>;
export default Home;

// src/Pages/Home/index.js
import loadable from '@loadable/component'

export default loadable(() => import(/* webpackChunkName: "Home" */ './Home'));
- Step1 Page
// src/Pages/Step1/Step1.js
const Home = () => <h2>Home</h2>;
export default Home;

// src/Pages/Step1/index.js
import loadable from '@loadable/component'

export default loadable(() => import(/* webpackChunkName: "Step1" */ './Home'));
- Step2 Page
// src/Pages/Step2/Step2.js
const Home = () => <h2>Home</h2>;
export default Home;

// src/Pages/Step2/index.js
import loadable from '@loadable/component'

export default loadable(() => import(/* webpackChunkName: "Step2" */ './Home'));
- Step3 Page
// src/Pages/Step3/Step3.js
const Home = () => <h2>Home</h2>;
export default Home;

// src/Pages/Step3/index.js
import loadable from '@loadable/component'

export default loadable(() => import(/* webpackChunkName: "Step3" */ './Home'));
Great! Now we can import these loadables into the routes in our App.js:
import Step1 from './Pages/Step1';
import Step2 from './Pages/Step2';
import Step3 from './Pages/Step3';
import Home from './Pages/Home';

const App = () => (
  <Router>
    <Switch>
      <Route path="/step-1">
        <Step1 />
      </Route>
      <Route path="/step-2">
        <Step2 />
      </Route>
      <Route path="/step-3">
        <Step3 />
      </Route>
      <Route path="/">
        <Home />
      </Route>
    </Switch>
  </Router>
);
The App.js looks cleaner but we want to make sure that the code splitting worked. Run again:
$ yarn analyze:bundle
And the generated stats is:
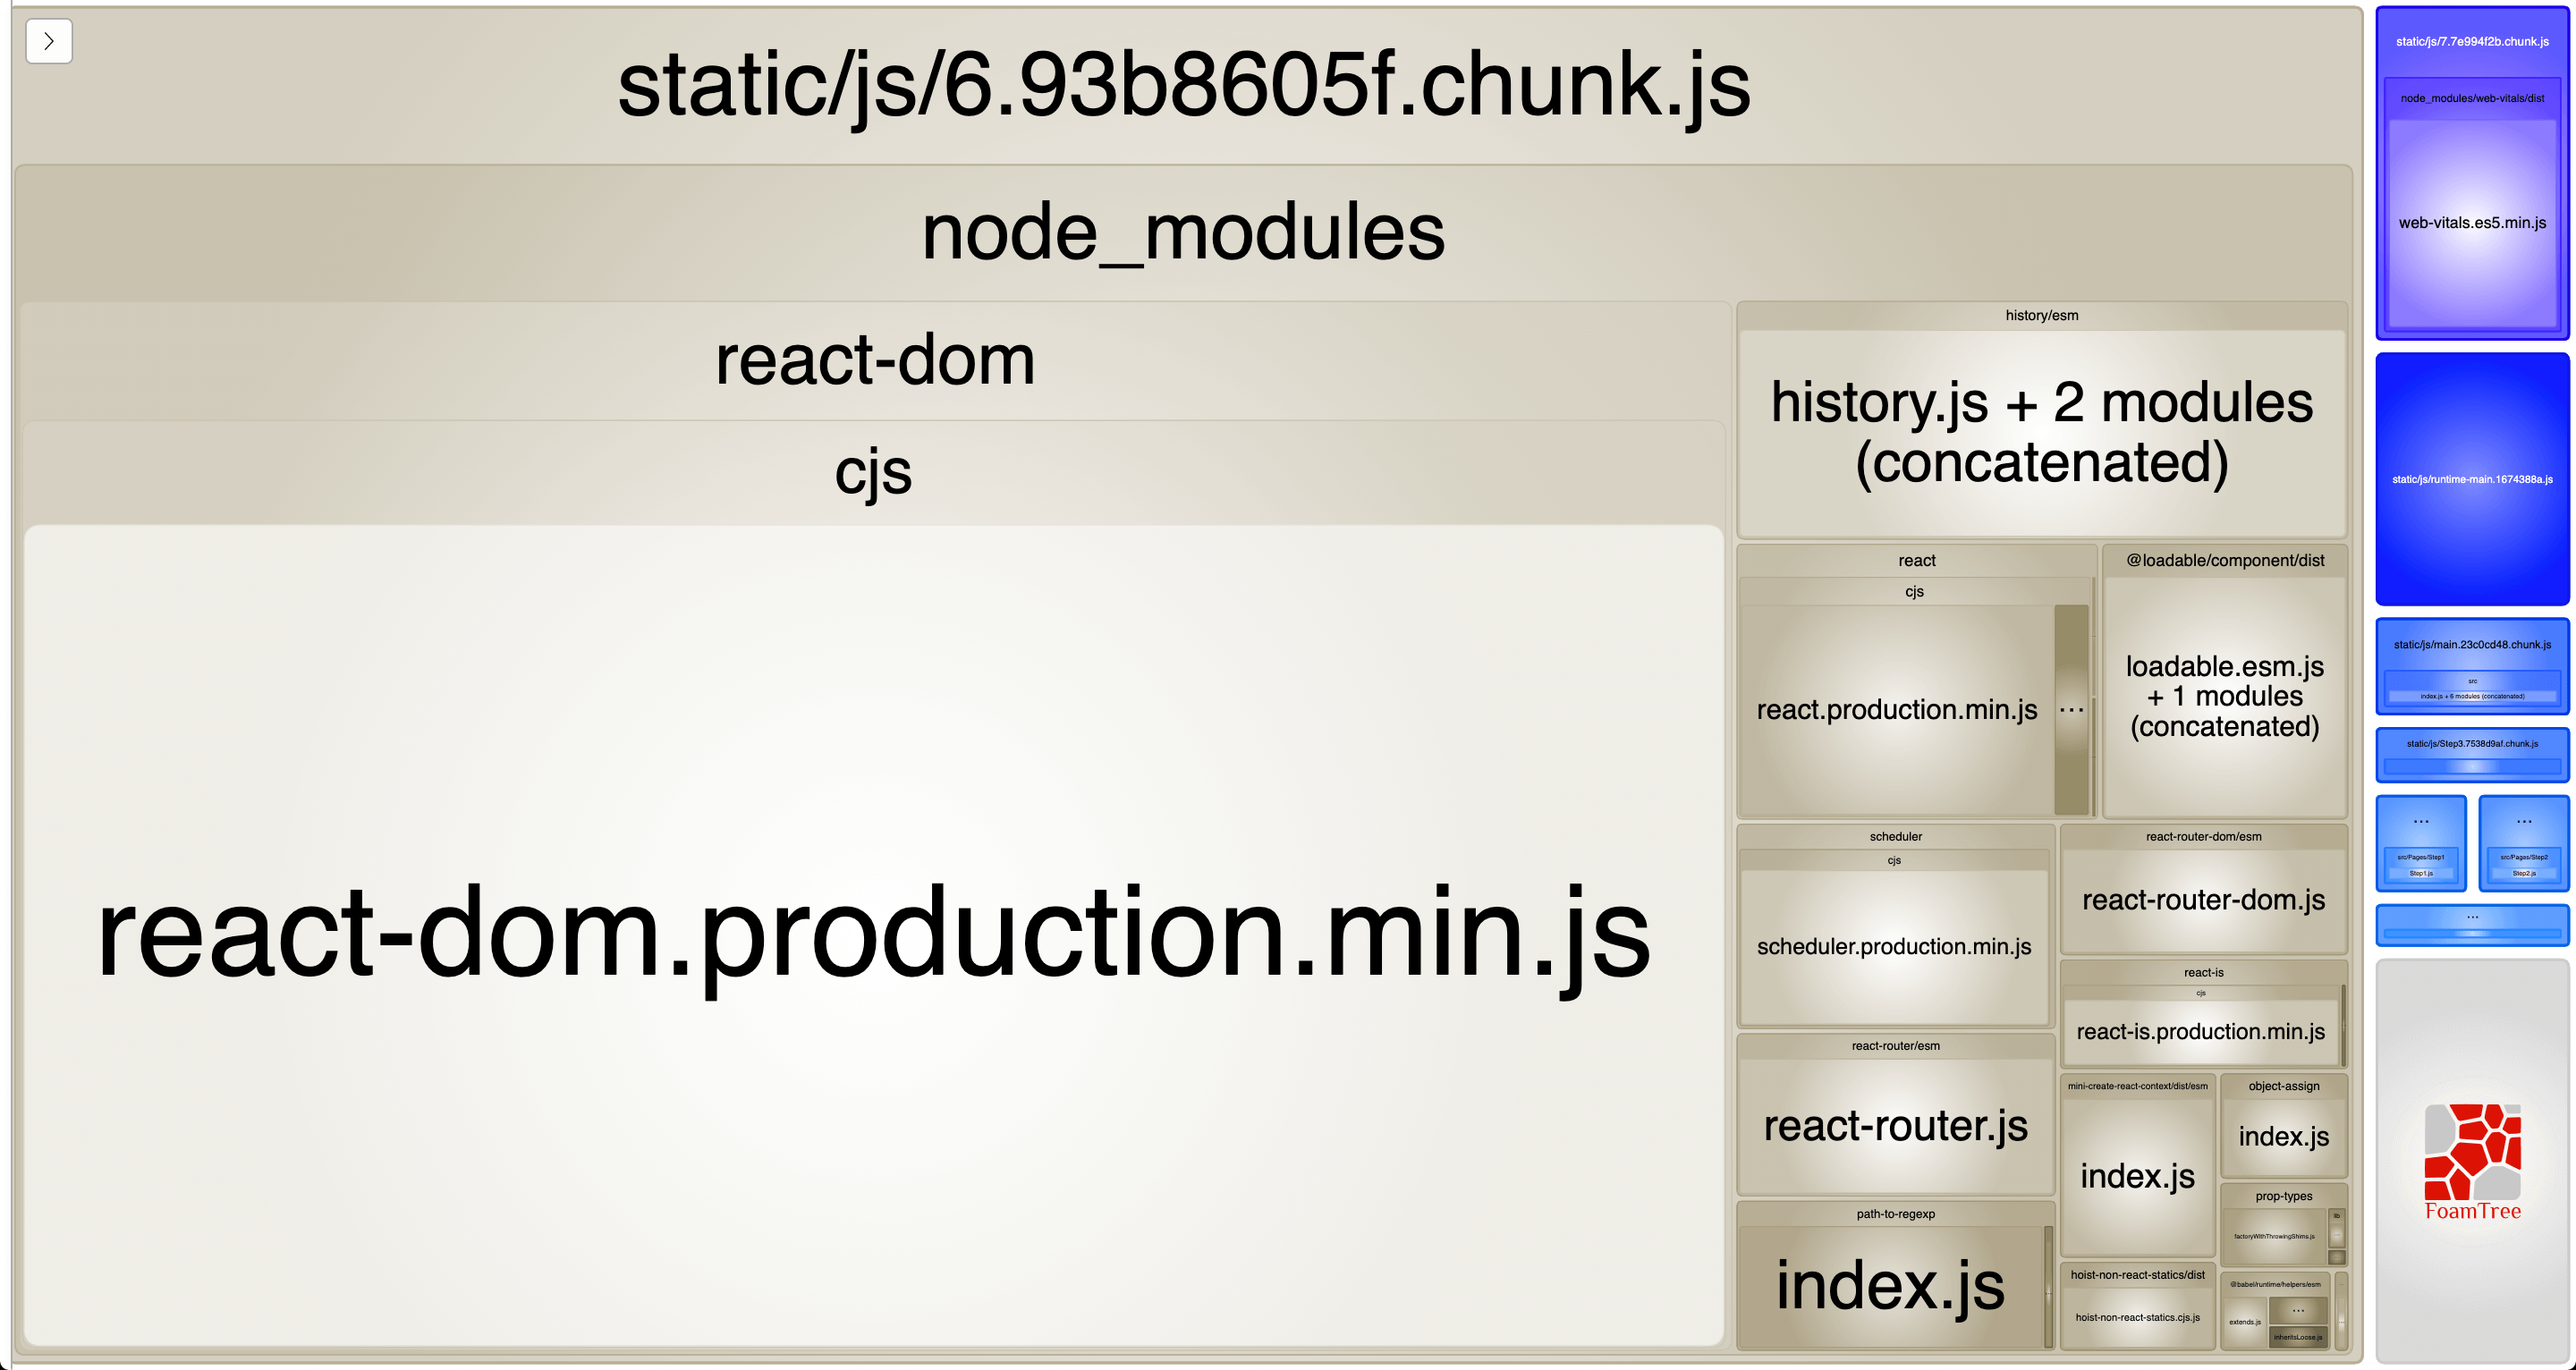
We can some small chunks created there. Let's look closely:
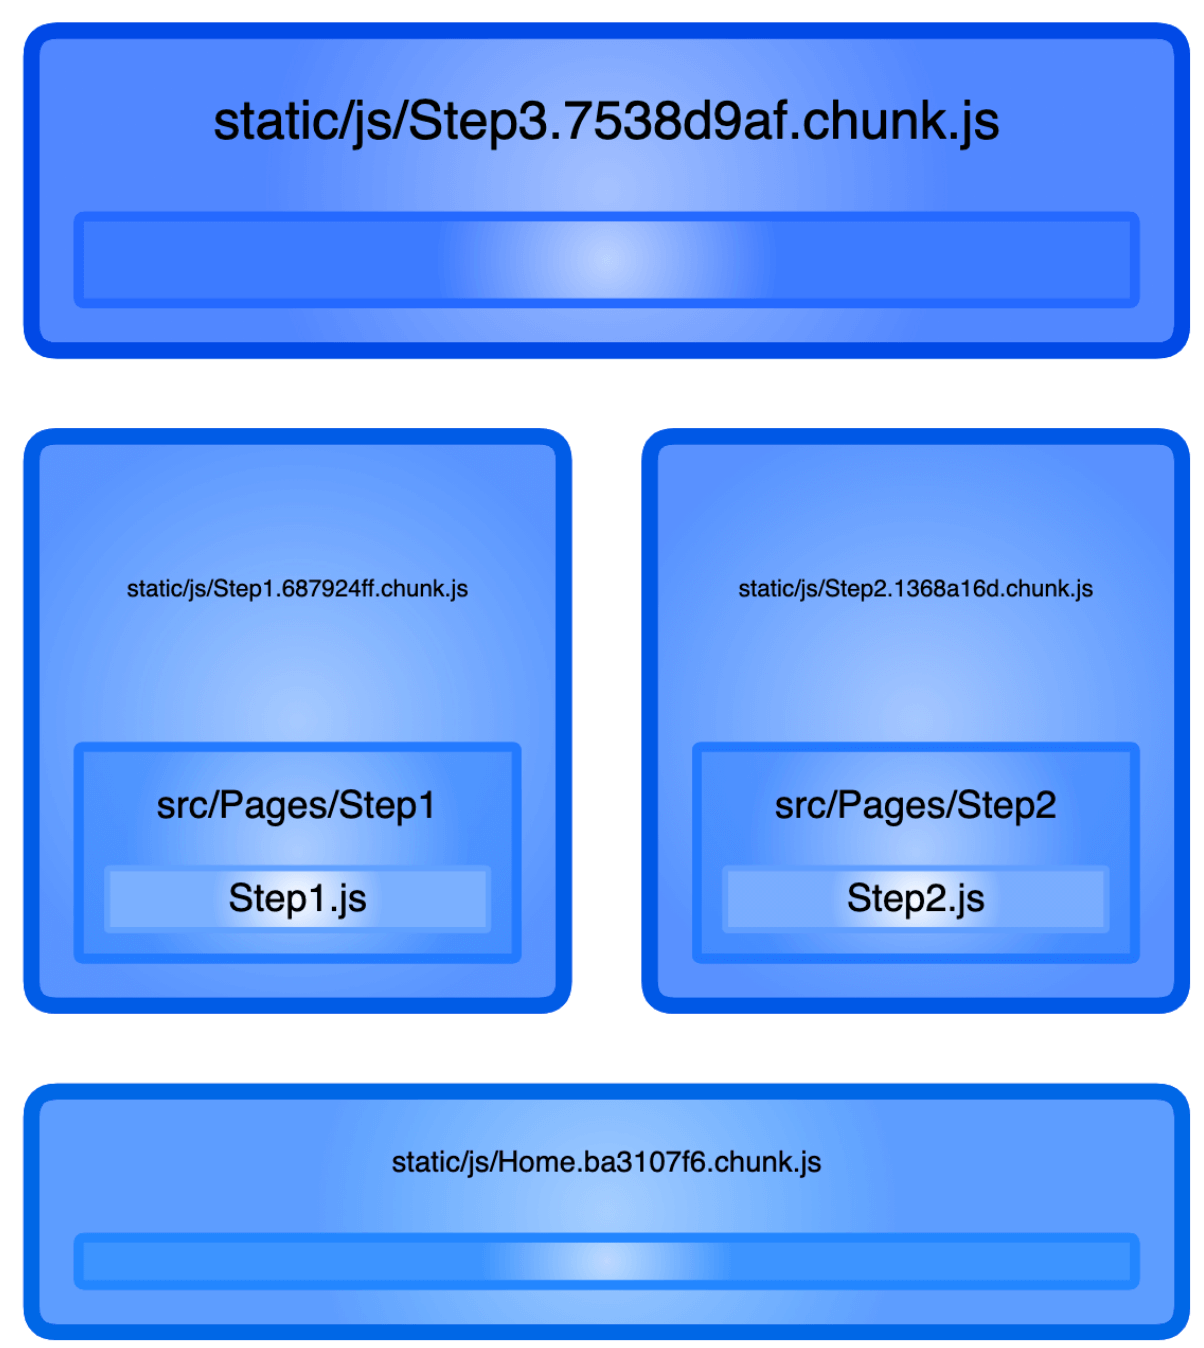
We have the Step1, Step2, Step3, and the Home chunks created. Now we are sure the code splitting worked for our routes.
Prefetch next page
As we learned before, a common way to prefetch resources (JavaScript bundles in our case) in HTML is to add a link tag with a rel="prefetch" in the application head tag.
<link rel="prefetch" href="/next-page-bundle.js">
But as we are building the application with a build tool (Webpack in our case), the chunks will have a hash, so it's not easy to know the chunk hash that was generated from this build tool.
In version 4, Webpack shipped a new feature to import chunks with this prefetch concept. We just need to import a module with the webpackPrefetch: true flag. Something like this:
import(/* webpackPrefetch: true */ 'path/to/the/module');
This is what we will do for each page. The user always starts on the Home page (/). The next probable page, she will visit is the Step 1 page (/step-1). The next page is the Step 2 page (/step-2), and then the Step 3 page (/step-3). Let's break down this idea to make it easier to digest:
Homepage: we prefetchStep 1page module.Step 1page: we prefetchStep 2page module.Step 2page: we prefetchStep 3page module.Step 3page: we don't need to prefetch anything here.
Great, let's implement this!
My first attempt was to just add the import statement in each page component:
import(/* webpackPrefetch: true */ 'Pages/Step1/Step1');
But when I add this import to the home page, we'll get all the chunks downloaded:

And if we see the head tag, we'll get this:
<script charset="utf-8" src="/static/js/Home.chunk.js"></script>
<link rel="prefetch" as="script" href="/static/js/Step1.chunk.js">
<link rel="prefetch" as="script" href="/static/js/Step2.chunk.js">
<link rel="prefetch" as="script" href="/static/js/Step3.chunk.js">
So for each component, it will try to prefetch the next page. This is why we have all the chunks downloaded in the Home page.
So one idea is to import each next page when the page component renders.
As we are changing the DOM, it's a side-effect, and call this in a useEffect hook. Let's see how it can work.
const Home = () => {
  useEffect(() => {
    import(/* webpackPrefetch: true */ 'Pages/Step1/Step1');
  }, []);

  return (
    <>
      <nav>
        <Link to="/step-1">Step 1</Link>
      </nav>
      <h2>Home</h2>
    </>
  );
};
If we go to the Home page and open the Network tab, we'll see the download of the Home.chunk.js as expected, but we also see the Step1.chunk.js.

And in the head tag, we'll find the following code:
<script charset="utf-8" src="/static/js/Home.chunk.js"></script>
<link rel="prefetch" as="script" href="/static/js/Step1.chunk.js">
So we make sure that the Home.chunk.js is download to show the page, but the Step1.chunk.js will be downloaded when the browser is in the idle time (prefetching).
We do the same thing for the Step 1 page, but now prefetching the Step 2 page module:
const Step1 = () => {
  useEffect(() => {
    import(/* webpackPrefetch: true */ 'Pages/Step2/Step2');
  }, []);

  return (
    <>
      <nav>
        <Link to="/step-2">Step 2</Link>
      </nav>
      <h2>Step1</h2>
    </>
  );
};
And now for the Step 2 page:
const Step2 = () => {
  useEffect(() => {
    import(/* webpackPrefetch: true */ 'Pages/Step3/Step3');
  }, []);

  return (
    <>
      <nav>
        <Link to="/step-3">Step 3</Link>
      </nav>
      <h2>Step2</h2>
    </>
  );
};
Final Words
To recap what we've learned:
- Set up routes: add 4 different pages to use for prefetching purpose
- Add webpack-bundle-analyzer: add library to make Webpack bundles easy to analyze
- Loadables for pages: code splitting adding loadable for each page
- Prefetch next page: using the Webpack prefetch feature to prefetch the next page
Resources
For more resources on performance, take at my Web Performance Research. It's a repository with all the resources I've been consuming to learn about performance.
If you are a visual person, I created this visual roadmap to learn web performance based on the webperf research repo: Web Performance Roadmap.